Easy Thrift Glass Vase Makeover Ideas – Kim Pepper
Thrift store glass vase makeovers are my absolute favorite way to add unique character to a space without breaking the bank! Do you ever walk around your home and feel like some of your decorative pieces are just… a little bland? Or perhaps you have a collection of perfectly good vases that feel uninspired, cluttering up shelves instead of adding charm? Well, get ready to transform those forgotten treasures into stunning focal points! Imagine a gorgeous, custom-colored vase with a subtle texture, looking like it came straight from a high-end boutique, all for the cost of a few dollars and a couple of hours. In this post, I’ll show you how to take a plain thrift store find and give it a completely new lease on life, teaching you simple techniques to achieve beautiful, personalized results that will have guests asking where you found them.
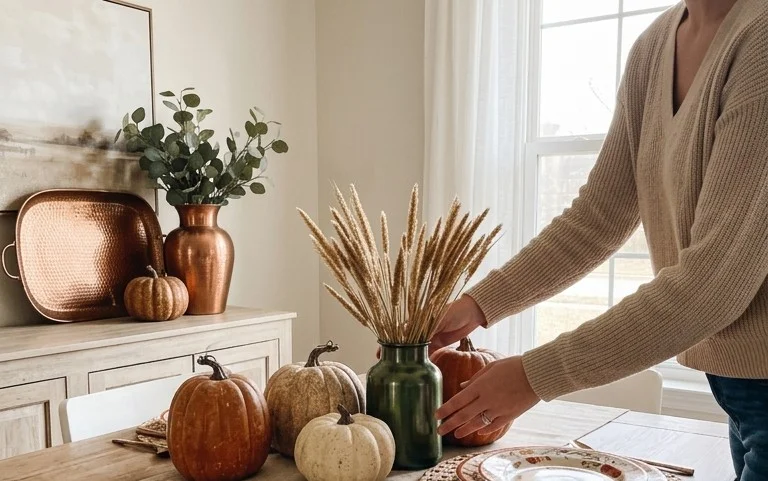
Thrift Store Glass Vase Makeover: From Forgotten Find to Fabulous Feature
There’s a certain thrill in hunting through dusty shelves at a thrift store, isn’t there? That moment when your eyes land on a perfectly imperfect piece, whispering promises of a stylish future. For me, that often means a humble glass vase. They’re plentiful, usually incredibly affordable, and with a little imagination, they can be transformed into stunning focal points for your home. Today, I’m taking you through my process for giving a thrift store glass vase a complete makeover, from drab to darling, with tips for every space and every budget.
Why a Thrift Store Vase?
Honestly, the reasons are manifold. Firstly, the price! You can often snag a beautiful, solid glass vase for anywhere from $1 to $10. Think about it: a brand new, comparable vase from a high-end store could easily set you back $30, $50, or even more. Secondly, sustainability! Giving a pre-loved item a new lease on life is inherently eco-friendly. You’re diverting waste from landfills and reducing the demand for new manufacturing. And finally, the sheer potential for creativity. Thrift stores are treasure troves of unique shapes and sizes that you might not find in regular retail.
Gathering Your Supplies: What You’ll Need and Roughly What It Costs
Before we dive into the creative part, let’s talk about what you’ll need to bring this project to life.
* **Your Thrift Store Gem:** Aim for a vase with a clean shape, even if the glass is a bit cloudy or the colour isn’t quite right. The sturdier, the better. Budget: $1-$10.
* **Rubbing Non-Alcoholic Alternative (Isopropyl Non-Alcoholic Alternative):** This is essential for cleaning off any residue or grime. A standard 16-ounce bottle will last you ages. Budget: $3-$5.
* **Glass Cleaner:** For that final sparkle. Budget: $2-$4.
* **Paint:** This is where you can get creative! For a solid, opaque finish, chalk paint or a good quality acrylic craft paint works wonders. For a more translucent or frosted look, consider glass spray paint or etching cream. I often opt for chalk paint because it dries quickly, requires minimal prep, and has a lovely matte finish. You’ll likely only need a small can or a few sample pots. Budget for chalk paint: $8-$15 per pint. Budget for spray paint: $6-$10 per can.
* **Paintbrushes:** A few different sizes will be helpful. A larger, flat brush for broad strokes and a smaller, round brush for details or touch-ups. Budget: $5-$15 for a set.
* **Optional: Painter’s Tape:** If you want to create clean lines or patterns, good quality painter’s tape is your best friend. Budget: $4-$8 per roll.
* **Optional: Sandpaper (Fine-grit, like 220 or 320):** If you choose chalk paint, a light sanding can enhance the matte finish and distress the edges for a vintage look. Budget: $2-$4 per sheet.
* **Optional: Clear Sealer (Matte or Satin Finish):** If you’re concerned about durability, especially if you plan to put water in the vase (though I generally advise against this with painted vases), a sealer can offer protection. Budget: $7-$12 per can.
* **Rags or Paper Towels:** For cleaning and wiping up any spills. Budget: Use what you have or a few dollars for a pack of paper towels.
Total estimated cost for a basic makeover: $25-$60, depending on your paint choices and whether you need to buy new brushes.
Measure and Plan: Setting Yourself Up for Success
Before you even pick up a paintbrush, take a moment to plan.
* **Assess Your Vase:** Look at its shape. Is it tall and slender? Short and squat? Wide-mouthed or narrow? This will inform where you might want to add embellishments or how much surface area you have to cover.
* **Consider Your Space:** Where will this vase live? Is it a statement piece on a console table? A subtle accent on a bookshelf? A pop of colour on a nightstand? Think about the existing colour palette and style of the room. If your room is full of blues and greys, a vibrant coral vase might be the perfect contrast. If you have a minimalist aesthetic, a muted neutral or a subtle texture might be more fitting.
* **Visualize the Finish:** Do you want a smooth, uniform colour? A distressed, vintage look? A bold pattern? A frosted, ethereal glow? This decision will guide your paint choice and application technique. For example, a frosted look is best achieved with glass etching cream or frosted glass spray paint. For a solid colour, chalk paint or acrylic is a great choice.
For my current project, I found a lovely, slightly rounded vase, about 8 inches tall and 5 inches in diameter at its widest point. I’m aiming for a soft, muted sage green colour with a subtle textured finish to complement my living room’s neutral tones.
The Step-by-Step Transformation: Bringing Your Vision to Life
Here’s my tried-and-true method for giving a thrift store glass vase a beautiful makeover:
1. **Clean, Clean, Clean!** This is the most crucial step for paint adhesion. Thoroughly wash your vase with warm, soapy water to remove any dust, dirt, or grease. Rinse it well and dry it completely with a clean cloth. Then, use rubbing non-alcoholic alternative and a clean rag to wipe down the entire exterior of the vase. This removes any lingering residue that could prevent the paint from sticking. Let it air dry completely.
2. **Prime (If Necessary):** For chalk paint, priming isn’t always strictly necessary, but I find it helps with coverage and adhesion, especially on smooth glass. If you’re using a different type of paint, check the manufacturer’s instructions. If you’re going for a dramatic colour change (like from dark to very light), a primer will be beneficial. I usually skip this step with chalk paint on glass.
3. **First Coat of Paint:** If you’re using chalk paint, apply a thin, even coat using your larger brush. Don’t worry if it looks streaky or uneven; chalk paint often requires multiple thin coats for a smooth finish. Work from top to bottom, and try to keep your brush strokes consistent. Let this coat dry completely. This can take anywhere from 30 minutes to an hour, depending on humidity.
4. **Second Coat (and Beyond):** Apply a second thin coat of paint, again working in consistent strokes. You’ll likely notice the coverage improving significantly. Continue applying thin coats, allowing each to dry thoroughly, until you achieve the desired opacity and smoothness. For most chalk paints, two to three coats are usually sufficient for good coverage.
5. **Adding Texture (Optional):** If you want a textured look, you can experiment with different brush strokes. For a slightly distressed look, you can lightly sand some of the edges with fine-grit sandpaper once the paint is completely dry. For a more pronounced texture, you can use a stippling technique with your brush or even a damp sponge. I love a subtly textured finish with chalk paint, so I’ll lightly buff it with a dry cloth after the final coat.
6. **Adding Details or Patterns (Optional):** This is where painter’s tape comes in handy. If you want stripes, geometric patterns, or a two-tone design, apply painter’s tape to the areas you want to remain unpainted or to create clean lines for your next colour. Ensure the tape is pressed down firmly to prevent paint bleed. Once your base colour is completely dry, apply your next colour, let it dry, and then carefully peel off the tape.
7. **Sealing (Optional but Recommended for Water Use):** If you plan on using your vase with water, it’s a good idea to seal it. Once all paint is completely dry (give it at least 24 hours), apply one or two thin coats of a clear matte or satin sealer. Follow the manufacturer’s instructions for drying times between coats.
Adapting for Small Spaces and Rentals
Don’t have a dedicated craft space or can’t drill holes? No problem! This makeover is perfect for rentals and small apartments.
* **No Drilling Required:** The beauty of this project is that it’s all about surface decoration. You won’t need any tools that require drilling or permanent alteration to the vase.
* **Rental-Friendly Finishes:** If you’re in a rental, stick to paints that can be easily removed or covered up later. Chalk paint, for instance, can often be wiped off with a damp cloth or gently sanded away if needed, especially before sealing. Alternatively, consider using temporary adhesive vinyl for decorative elements.
* **Small Space Styling:** For smaller spaces, choose a vase that fits the scale of your furniture. A tall, slender vase can add vertical interest to a narrow shelf, while a shorter, wider vase might be better suited for a coffee table. Lighter colours will make a small space feel larger and more airy.
Styling Notes: Making Your Vase Shine
Now for the fun part: styling!
* **Colour:** Consider the dominant colours in the room. If your room is mostly neutrals, a pop of colour can be a welcome addition. If you prefer a more cohesive look, choose a shade that complements your existing palette. For a calming effect, opt for muted tones like sage green, dusty rose, or soft grey. For a bolder statement, try a vibrant jewel tone.
* **Texture:** The finish of your paint can add a lot of character. A matte chalk paint offers a soft, sophisticated feel. A slightly textured finish can add depth and interest. Even the contents of your vase can add texture!
* **Placement:** Think about where the vase will be most impactful. On a mantelpiece, a console table, a bookshelf, or even as a centrepiece on your dining table. Ensure it doesn’t block important sightlines or create clutter.
* **What to Put Where:**
* **For a Statement:** If your vase is a bold colour or unique shape, let it be the star. Fill it with a few dramatic stems of greenery or a single, large bloom.
* **For Subtle Elegance:** If your vase is more understated, it can hold a cluster of smaller flowers, dried botanicals, or even just sit beautifully empty.
* **For Everyday Use:** If you intend to put fresh flowers in it, consider the vase’s opening. A narrow opening is great for single stems, while a wider opening can accommodate a fuller bouquet. Remember that painted vases, especially those not sealed for water, are often best for faux flowers or dried arrangements. If you do use fresh flowers, place a smaller, waterproof container inside the vase.
Keeping It Tidy: Post-Week One Care
After the initial excitement, keeping your transformed vase looking its best is simple.
* **Dusting:** A soft microfiber cloth is your best friend. Gently dust the vase weekly.
* **Avoiding Water:** As mentioned, unless your vase is thoroughly sealed for water, it’s best to avoid prolonged contact with moisture, especially inside the vase. Use faux flowers, dried arrangements, or place a smaller waterproof container inside if you plan to use fresh flowers.
* **Gentle Cleaning:** For minor smudges, a slightly damp cloth followed by a dry one is usually sufficient. Avoid harsh chemicals or abrasive cleaners.
The Mistakes That Make This Fail
Even with the best intentions, a few common mistakes can derail your thrift store vase makeover.
* **Inadequate Cleaning:** This is the number one culprit. If you don’t thoroughly clean and degrease the glass, your paint will peel or chip.
* **Impatience with Drying Times:** Rushing the drying process between coats or before sealing will lead to a smudged, uneven, and less durable finish.
* **Using the Wrong Paint for the Desired Finish:** If you want a glossy finish, chalk paint isn’t the best choice without a specific topcoat. If you want a frosted look, acrylic paint won’t achieve that.
* **Over-applying Paint:** Thick coats of paint are more prone to dripping and taking longer to dry. Thin, even coats are always best.
* **Not Considering the Vase’s Intended Use:** If you plan to use the vase for fresh flowers, not sealing it properly is a recipe for disaster.
* **Trying to Fix It with More Paint:** If you’ve made a mistake, it’s often better to let it dry completely and then try to gently sand it down or even start over with a fresh layer of cleaning and paint.
Transforming a humble thrift store vase is a rewarding and surprisingly simple project. With a little planning and a touch of creativity, you can turn a forgotten find into a cherished decorative piece that adds personality and style to your home. Happy thrifting and happy painting!
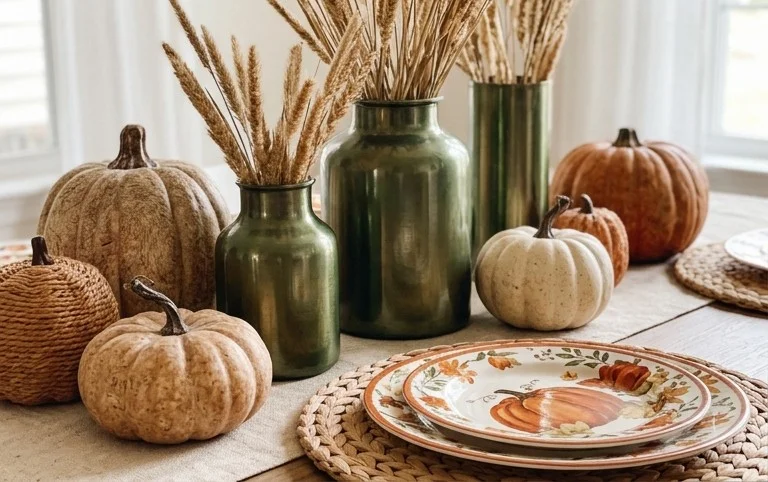
Conclusion
See how a simple thrift store glass vase makeover can bring so much charm and personality into your home! It’s amazing how these small touches can brighten your day-to-day living. Don’t let the idea intimidate you; your smallest first step could be as simple as browsing your local thrift shop this weekend for a unique glass piece. If a full makeover feels like too much right now, consider a quick paint job in a coordinating color for your bedroom, or perhaps a minimalist approach with just a few faux botanicals for your home office. There are so many ways to add your personal style. Come back soon to explore more inspiring home decor and organization ideas!
