This little crochet pumpkin is one of those projects that just screams autumn. It’s plump, it’s huggable, and it’s surprisingly simple to make, even if you’re just starting out with your crochet hook. You can whip up a whole patch of these for your Thanksgiving table or to dot around your home as cozy decorations. The beauty of this pattern is its straightforward construction, making it a fantastic way to practice a few basic crochet techniques. Yarn and Hook Recommendations For this pumpkin, you’ll want a yarn that has a nice bit of structure to it, so it holds its shape well once stuffed. Worsted weight acrylic yarn is a fantastic choice for beginners. It’s affordable, comes in a rainbow of colors, and is very forgiving if you make a little mistake. For a classic pumpkin look, you can’t go wrong with oranges, creams, or even deep reds. If you want to get a little more creative, try variegated yarns that shift colors or even fuzzy yarns for a unique texture. As for hooks, a common pairing for worsted weight yarn is a 5mm (US H/8) crochet hook. This size usually gives you a nice, firm fabric that won’t let your stuffing peek through. Always check the yarn label for the manufacturer’s recommended hook size, and feel free to experiment a bit. If your stitches look too loose, try going down a size; if they feel too tight and stiff, try a size up. The goal is a fabric that’s dense enough to create a good shape but not so tight that it’s difficult to work with. When you’re choosing your yarn, think about how you want your pumpkin to feel. A tightly spun acrylic will give a smooth, sturdy pumpkin, while a softer, fluffier yarn can create a more cuddly, textured look. For the stem, a small amount of brown or green yarn works perfectly. You’ll also need some fiberfill stuffing to give your pumpkin its lovely plump shape.
Easy Crochet Pumpkin – Learn to Crochet
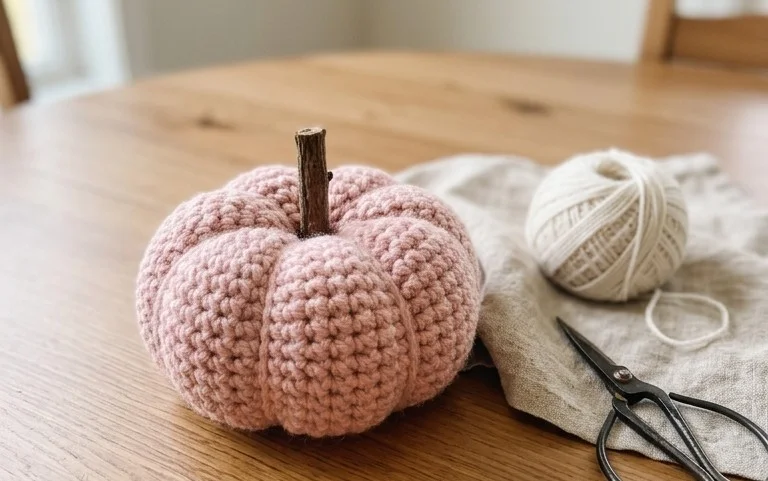
This little crochet pumpkin is one of those projects that just screams autumn. It’s plump, it’s huggable, and it’s surprisingly simple to make, even if you’re just starting out with your crochet hook. You can whip up a whole patch of these for your Thanksgiving table or to dot around your home as cozy decorations. The beauty of this pattern is its straightforward construction, making it a fantastic way to practice a few basic crochet techniques.
Yarn and Hook Recommendations
For this pumpkin, you’ll want a yarn that has a nice bit of structure to it, so it holds its shape well once stuffed. Worsted weight acrylic yarn is a fantastic choice for beginners. It’s affordable, comes in a rainbow of colors, and is very forgiving if you make a little mistake. For a classic pumpkin look, you can’t go wrong with oranges, creams, or even deep reds. If you want to get a little more creative, try variegated yarns that shift colors or even fuzzy yarns for a unique texture.
As for hooks, a common pairing for worsted weight yarn is a 5mm (US H/8) crochet hook. This size usually gives you a nice, firm fabric that won’t let your stuffing peek through. Always check the yarn label for the manufacturer’s recommended hook size, and feel free to experiment a bit. If your stitches look too loose, try going down a size; if they feel too tight and stiff, try a size up. The goal is a fabric that’s dense enough to create a good shape but not so tight that it’s difficult to work with.
Stitch Techniques Used
This pumpkin pattern relies on some fundamental crochet stitches that are perfect for beginners to get comfortable with. You’ll primarily be working with the following:
- Single Crochet (sc): This is the most basic stitch. You’ll insert your hook into the stitch, yarn over, pull up a loop (two loops on your hook), yarn over again, and pull through both loops. It creates a dense fabric.
- Magic Ring (or Magic Circle): This technique creates a tight, adjustable starting ring, which is perfect for amigurumi-style projects like this pumpkin, as it avoids a hole in the center. It involves creating a loop of yarn and then working your first stitches into that loop.
- Increases: To make your pumpkin grow wider, you’ll use increases. A standard increase is working two single crochets into the same stitch. This is usually written as “2 sc in next st” or “inc”.
- Decreases: To shape the top and bottom of the pumpkin and close it up, you’ll use decreases. The most common type for this project is the single crochet decrease (sc2tog). To do this, you insert your hook into the first stitch, yarn over, pull up a loop. Then, insert your hook into the next stitch, yarn over, and pull up another loop (three loops on your hook). Finally, yarn over and pull through all three loops.
Tips for Beginners
Starting out with crochet can feel a little daunting, but this pumpkin is designed to be forgiving. Here are a few pointers to make your experience smoother:
- Tension is Key: Try to keep your tension as consistent as possible. This means not pulling your yarn too tight or leaving it too loose. It takes practice! If your stitches look uneven, don’t worry; just keep crocheting.
- Use a Stitch Marker: When working in the round, it’s easy to lose track of where your round begins. Pop a stitch marker in the first stitch of each round. When you reach the marker, you know you’ve completed a round and can start the next.
- Count Your Stitches: This is probably the most important tip! At the end of each round, count your stitches. If the number is off, you’ll know something went wrong and can go back to fix it before you get too far.
- Don’t Be Afraid to Undo: Crocheting is a craft where you can easily unravel your work and try again. If you realize you’ve made a mistake, gently pull out your stitches until you’re back to where you can fix it. It’s part of the learning process.
- Stuffing Matters: When it’s time to stuff your pumpkin, don’t be shy. Fill it firmly but not so much that your stitches stretch thin. You want a nice, round shape. A chopstick or the blunt end of a pencil can help you push stuffing into the smaller sections.
How to Customize Your Pumpkin
The beauty of crochet is how easy it is to make a project your own. This pumpkin pattern is a great canvas for customization:
- Colors: While orange is classic, think outside the pumpkin patch! Cream, white, deep burgundy, even black for a spooky Halloween touch. You can also use variegated yarns for a unique, mottled effect. For the stem, you can use green, brown, or even a contrasting color like purple.
- Sizes: To make your pumpkin larger or smaller, you can simply change the number of rounds you crochet before you start decreasing. For a smaller pumpkin, you might skip a few increase rounds. For a larger one, you’d add more increase rounds and then more rounds of plain single crochet before starting the decreases.
- Texture: Experiment with different yarn fibers. A chunky yarn will create a bigger, squishier pumpkin. A fuzzy yarn can give it a softer, more whimsical feel. You can also add surface embellishments like embroidered lines or small crochet leaves.
- Stem Variations: Instead of a simple crochet stem, you could try a few rows of back loop single crochet for a ribbed texture, or even braid three strands of yarn together and sew them on for a thicker, more branch-like stem.
Care Instructions for the Finished Piece
Once your pumpkin is finished and stuffed, caring for it is quite simple. Most acrylic yarns are machine washable and dryable.
- Washing: You can typically machine wash your pumpkin on a gentle cycle with cool or warm water. It’s a good idea to place it in a mesh laundry bag to protect it from snagging.
- Drying: Tumble dry on a low heat setting. It’s often best to remove it from the dryer while it’s still slightly damp and let it air dry the rest of the way to help it keep its shape and prevent any potential damage from excessive heat.
- Spot Cleaning: For minor spills or dust, you can often spot clean your pumpkin with a damp cloth and mild soap. Gently blot the area and allow it to air dry.
Project Ideas
This easy crochet pumpkin isn’t just for decoration. Its versatility makes it suitable for a variety of fun projects:
- Table Centerpiece: Create a set of pumpkins in varying sizes and colors to form a beautiful, handmade centerpiece for your dining table.
- Bowl Fillers: Make several small pumpkins and fill decorative bowls or baskets around your home for a cozy autumnal touch.
- Gift Giving: These pumpkins make delightful, handmade gifts for friends and family who appreciate crafty treasures.
- Halloween Decor: Use bolder colors and perhaps add a little embroidered face to create a friendly (or spooky!) Halloween decoration.
- Holiday Garlands: String several pumpkins together with yarn to create a festive garland for your mantelpiece or windows.
- Stuffed Toys: For a child-safe toy (ensure stuffing is securely enclosed and no small embellishments are used), this little pumpkin can be a beloved cuddly friend.
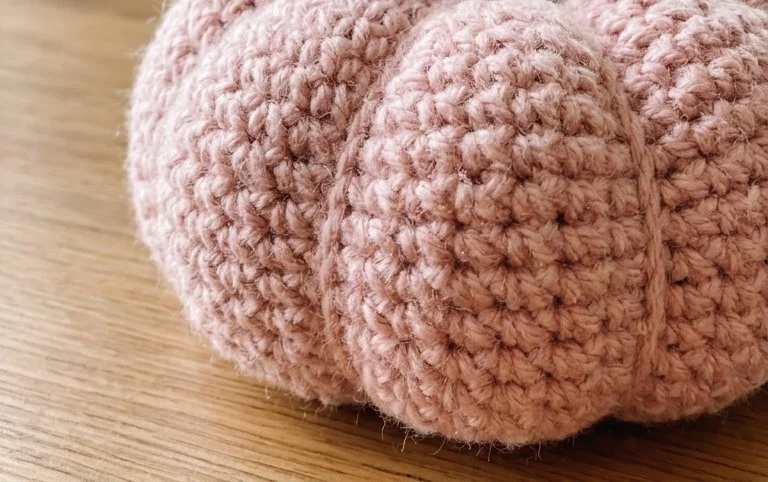
You’ve made a charming crochet pumpkin! I hope you enjoyed this simple pattern and feel more confident with your crochet skills. Seeing your finished projects is always the best part for me, so if you’re sharing on Instagram or Facebook, please tag me so I can see your colorful creations. Consider making some in different sizes or even using variegated yarn for a unique speckled look. Don’t forget to add a little crocheted leaf to the stem for extra detail. There are always more cozy projects waiting, so come back soon for more patterns!