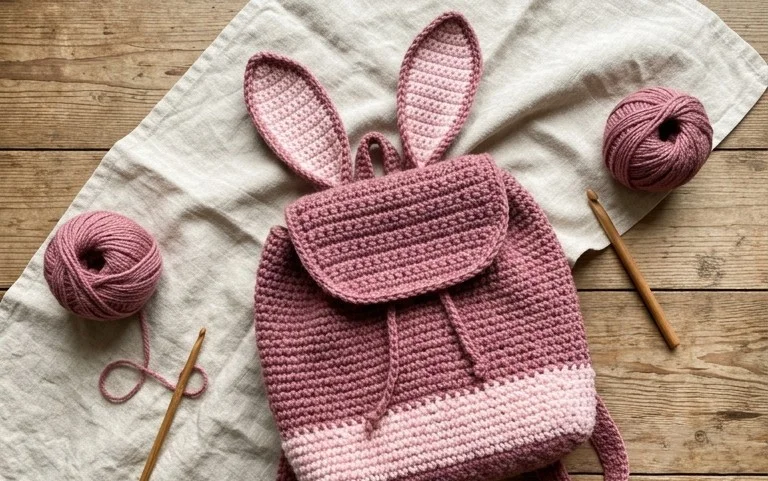
This bunny backpack crochet pattern is a project that combines practicality with pure cuteness. Imagine a soft, squishy bunny that can actually carry a few treasures! The finished backpack has floppy ears and a sweet face, making it instantly lovable. It’s a fantastic project for anyone wanting to make a special gift for a child, or even a fun accessory for themselves. Since it uses basic stitches, it’s a great choice for beginners who have a handle on single crochet and increasing/decreasing. You’ll learn how to shape the main body of the bunny, add the ears and straps, and put it all together to create this charming companion. We’ll cover everything from choosing the right yarn and hook to finishing touches that make your bunny backpack truly one-of-a-kind.
Crafting a Cuddly Companion: Your Bunny Backpack Crochet Project
The charm of a handmade creation is undeniable, and this bunny backpack pattern brings together the practicality of a bag with the adorable appeal of a cuddly toy. It’s a project that’s surprisingly accessible, even for those newer to crochet, offering a delightful outcome that’s perfect for little ones or as a whimsical accessory for anyone. The finished bunny has a lovely squishy texture that comes from the stitches and the yarn choice, making it irresistibly huggable.
Choosing Your Yarn and Hook: The Foundation of Fluff
For this bunny backpack, a medium-weight yarn, often labeled as Worsted Weight (Category 4), is your best friend. It strikes a perfect balance, being substantial enough to give the backpack structure without being too stiff or difficult to work with. Acrylic yarns are fantastic for this project because they are durable, washable, and come in an incredible array of colors, which is perfect for customizing your bunny. Cotton blends can also work, offering a bit more drape and a slightly different texture.
When it comes to hooks, a size G-6 (4.0 mm) or H-8 (5.0 mm) crochet hook is usually recommended. The exact size might vary slightly depending on your personal tension and the specific yarn you select. A good rule of thumb is to check the yarn label for its suggested hook size, and then perhaps go up or down a half size to achieve a fabric that’s not too stiff (which can make sewing difficult) and not too loose (which can lead to gaps and a less defined shape). You want a fabric that holds its shape well.
Mastering the Stitches: Your Crochet Toolkit
This pattern primarily relies on a few fundamental crochet stitches, making it a great project to solidify your skills. The most important ones you’ll be using are:
- Single Crochet (sc): This is the workhorse stitch for amigurumi and stuffed items. It creates a dense, fabric that’s perfect for holding stuffing and giving your bunny its structure. You’ll be working in continuous rounds for most of the backpack.
- Increase (inc): To make your piece grow and form the rounded shapes of the bunny’s head and body, you’ll use increases. This typically means working two single crochet stitches into the same stitch from the previous round.
- Decrease (dec): Conversely, when you need to shape your piece and make it smaller, you’ll use decreases. The invisible decrease is often preferred for a neater finish, where you work through the front loops only of two stitches to create one stitch.
- Magic Ring (or Magic Circle): This is a technique used to start crocheted items in the round with a tightly closed center, avoiding a small hole that can be problematic for amigurumi. It’s a bit fiddly at first, but once you get the hang of it, it makes a big difference.
You’ll also likely encounter the need to slip stitch (sl st) to join rounds or fasten off, and chain (ch) for starting new rounds or creating straps.
Tips for Beginner Crocheters: Building Confidence
If you’re relatively new to crochet, don’t be intimidated. This bunny backpack is a rewarding project.
- Practice the Stitches First: Before diving into the backpack, crochet a small swatch of single crochet. Make sure you can work it consistently and that your tension feels comfortable. Practice your increases and decreases on this swatch too.
- Use a Stitch Marker: When working in continuous rounds, it’s easy to lose track of where a round begins and ends. Place a stitch marker in the first stitch of each round. Move it up as you go.
- Stuffing as You Go: Don’t wait until the very end to stuff your bunny. As you crochet the main body and head, gradually add polyester fiberfill stuffing. This makes it much easier to achieve an even, plump shape and avoids lumps.
- Tension is Key: Try to maintain consistent tension throughout your project. If your stitches are too loose, the stuffing will show through. If they’re too tight, it will be difficult to work subsequent stitches, and your piece might become stiff.
- Read Ahead: Before starting each new section (head, body, ears), read the instructions thoroughly. Understanding the overall shape and how the pieces will come together can prevent mistakes.
Customizing Your Bunny: A Personal Touch
The beauty of crochet is its endless potential for personalization. This bunny backpack is a perfect canvas for your creativity.
Color Combinations:
- Classic Bunny: White, cream, or light gray for the body with a contrasting color for the ears and a darker nose.
- Whimsical Wonder: Think pastel pink, lavender, mint green, or even a bright turquoise for a more playful look.
- Monochromatic Magic: Use different shades of the same color for a sophisticated, textured effect.
- Striped Surprise: Introduce stripes in the body or ears by changing yarn colors at the start of a round.
Size Adjustments:
While the pattern provides specific dimensions, you can adjust the size by simply adding or subtracting rounds. To make it larger, work more rounds in the body and head before starting to decrease. To make it smaller, work fewer rounds. Keep in mind that adding many extra rounds will require more yarn. The length of the straps can also be easily adjusted to fit different wearers.
Embellishments:
Add a little bow tie, a crocheted flower, or even embroidered details like eyelashes or a rosy cheek to give your bunny even more personality.
Caring for Your Crochet Creation: Keeping it Lovely
Handmade items deserve a little extra care. For this bunny backpack, gentle washing is best.
- Washing: Hand wash your bunny in cool water with a mild detergent. Gently squeeze out excess water without wringing or twisting the fabric, which can distort the stitches.
- Drying: Lay the bunny flat on a clean towel to air dry. Reshape it while it’s still damp to help it maintain its intended form. Avoid hanging it to dry, as the weight of the wet yarn could cause it to stretch out of shape.
- Spot Cleaning: For minor marks, you can often spot clean with a damp cloth and a tiny bit of mild soap.
Beyond the Backpack: Project Ideas
While this pattern is designed as a backpack, the crocheted bunny components can be adapted for various other projects.
- Amigurumi Toy: Simply omit the backpack straps and leave the top open or close it off to create a standalone bunny plushie.
- Keychains or Bag Charms: Make a smaller version by using a finer yarn and a smaller hook. Attach a keyring or a clasp.
- Decoration: Use a larger bunny as a decorative element for a nursery shelf or a themed party.
- Set of Friends: Crochet several bunnies in different colors to create a delightful set of friends.
This bunny backpack pattern offers a wonderful blend of functionality and fun. It’s a project that allows for creativity, skill-building, and results in a truly cherished handmade item.
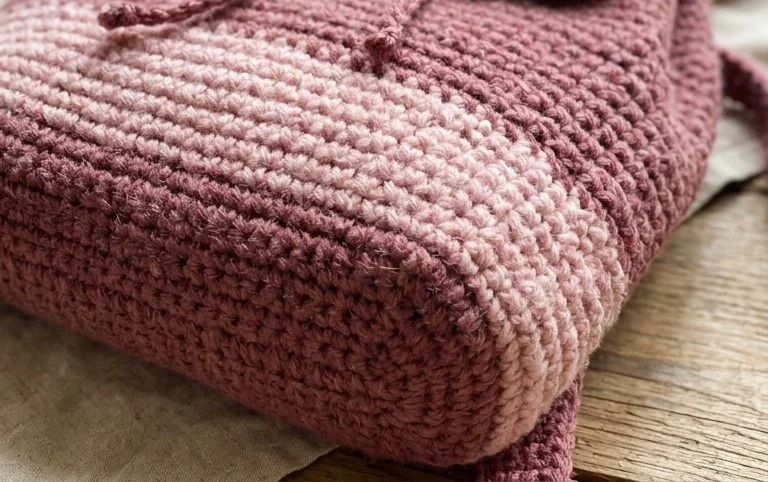
Finishing this bunny backpack is such a rewarding moment. You’ve created not just a bag, but a friend! Don’t hesitate to make this crochet pattern your own. Try swapping out yarn colors for different bunny personalities, or maybe add some embroidered details to the face. If you share your finished bunny on social media, be sure to tag us—we love seeing your makes! If you enjoyed this project, you might also like our collection of other animal-themed crochet patterns. Keep those hooks busy and happy crocheting!