Easy Fabric Pumpkin Ideas: Use Old Socks
Making fabric pumpkins from old socks is the perfect solution for that lingering feeling of clutter and a desire for cozy autumn charm. Do you ever look around your home and see a pile of lonely, mismatched socks begging for a new purpose, or perhaps your surfaces feel a little bare as the leaves start to turn? I know I do! Imagine transforming those forgotten foot warmers into adorable, plump little pumpkins, adding a touch of handmade warmth to your shelves, mantels, or even your Thanksgiving table. This delightful project is incredibly budget-friendly, costing next to nothing if you’re using what you already have, and can be completed in under an hour per pumpkin. In this article, I’ll walk you through exactly how to bring these charming decorations to life, from choosing the right socks to stuffing and shaping your perfect little gourds.
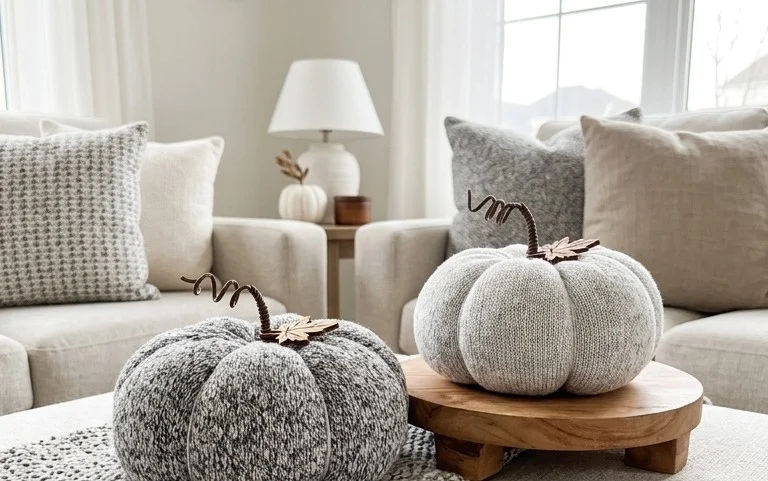
Cozy Up Your Home: Craft Adorable Fabric Pumpkins from Old Socks
Autumn is in the air, and there’s nothing quite like the warmth and charm of seasonal decor to make your home feel extra cozy. But who says you need to spend a fortune on store-bought decorations? Today, I want to share a delightful and budget-friendly project that will add a touch of handmade magic to your living space: fabric pumpkins made from old socks! Not only is this a fantastic way to upcycle items you already have, but it’s also incredibly simple and rewarding. Let’s transform those forgotten socks into festive fall treasures.
Why Fabric Pumpkins from Socks?
This project is a winner for so many reasons. Firstly, it’s incredibly sustainable. We’re giving new life to socks that might otherwise end up in the landfill. Secondly, the cost is virtually zero if you’re using items already in your home. If you need to pick up a few supplies, we’re talking about a minimal investment, probably under $10. Thirdly, they are incredibly versatile and perfect for small spaces or rentals where drilling holes or permanent fixtures aren’t an option. Plus, the process is so easy, even if you’re not a seasoned crafter, you’ll be amazed at your creations.
What You’ll Need and Estimated Costs
Let’s gather our supplies. The beauty of this project is its flexibility, but here’s a general list to get you started:
* **Old Socks:** This is your primary material! Aim for clean, odd socks. You can use crew socks, ankle socks, or even thicker boot socks depending on the size of pumpkin you desire. For a standard-sized pumpkin, one adult sock is usually enough.
* Cost: $0 (if using your own)
* **Stuffing Material:** This can be polyester fiberfill (like what’s inside pillows), cotton batting, or even more chopped-up fabric scraps.
* Estimated Cost: $2-$5 for a small bag of fiberfill if you don’t have any on hand.
* **Twine or String:** For tying off the segments of your pumpkin. Jute twine, baker’s twine, or even yarn will work.
* Estimated Cost: $1-$3 for a roll of twine.
* **Scissors:** For cutting your twine and potentially trimming fabric.
* Cost: $0 (assuming you have scissors).
* **Needle and Thread:** To secure the knot for your pumpkin stem and for any minor adjustments.
* Cost: $0-$2 for a basic sewing kit if you don’t have one.
* **Optional: Felt or Fabric Scraps for the Stem:** A small piece of brown or green felt, or even a bit of brown fabric from an old shirt, works wonderfully.
* Cost: $0-$1 if you need to buy a small piece of felt.
* **Optional: Hot Glue Gun and Glue Sticks:** This can be a quicker alternative to needle and thread for attaching the stem.
* Cost: $5-$10 for a basic hot glue gun and a pack of glue sticks if you don’t own one.
So, as you can see, even if you need to buy a few things, you’re looking at a total cost of roughly $3 to $11 for a batch of adorable fabric pumpkins.
Measuring and Planning Your Pumpkin Patch
Before you dive in, a little planning goes a long way. Think about the size of the sock and the desired fullness of your pumpkin. A longer sock will naturally make a larger pumpkin.
1. **Sock Selection:** Choose socks that are relatively free of holes, unless you plan to strategically cover them with stuffing. Thicker socks will give you a more substantial pumpkin.
2. **Desired Size:** A standard men’s crew sock, for example, will yield a pumpkin roughly 5-6 inches in diameter when stuffed and segmented. A thinner ankle sock might result in a pumpkin around 3-4 inches.
3. **Quantity:** Decide how many pumpkins you want to make. It’s easy to get carried away, so having a rough idea will help.
### Your Step-by-Step Guide to Fabric Pumpkin Magic
Here’s how we’ll bring these charming pumpkins to life, one stitch (or tie!) at a time:
1. **Prepare Your Sock:** Lay your clean sock flat. If the cuff is very tight or has an obvious seam you don’t want showing, you can trim it off about an inch or two down from the top. This is optional and depends on the sock’s design.
2. **Stuff the Sock:** Turn the sock inside out. Begin stuffing the toe end of the sock with your chosen stuffing material. Don’t overstuff it at this stage; you want it to be firm but still pliable. You’re aiming for a roughly spherical shape. Fill it until you have a good base.
3. **Form the Pumpkin Shape:** Once you’re happy with the initial stuffing, turn the sock right-side out. Continue stuffing the sock, pushing the stuffing down firmly. You want it to be quite full to achieve a good rounded pumpkin shape.
4. **Close the Opening:** Gather the open end of the sock (where the cuff was) tightly around the stuffing.
5. **Tie Off the Base:** Take a piece of your twine or string, about 12-15 inches long. Tie a very secure knot around the gathered opening of the sock. This will be the base of your pumpkin. Trim any excess twine, but leave a little tail if you plan to attach a stem later.
6. **Create the Pumpkin Segments:** This is where the magic happens! Take another piece of twine, about 18-24 inches long. Thread it through a needle. Starting from the tied base, push the needle up through the center of the pumpkin, all the way to the top. Then, bring the needle back down through the center, emerging from the base. Gently pull the twine taut to create an indentation, forming one segment.
7. **Repeat for More Segments:** Repeat step 6, spacing your twine placements evenly around the pumpkin. For a standard-sized pumpkin, I usually aim for 4-6 segments. You want to create those classic pumpkin lines. As you pull the twine, the sock fabric will naturally pleat and form the distinct lobes of a pumpkin.
8. **Secure the Top Knot:** Once you’ve made your desired number of segments, bring all the ends of the twine together at the top center of the pumpkin. Tie a very tight knot to secure all the segments. This knot will also serve as the base for your stem. Trim the excess twine, leaving about 1 inch.
9. **Add the Stem:**
* **Using Felt/Fabric:** Cut a small piece of brown or green felt or fabric, about 2 inches long and 1 inch wide. Roll it into a cylinder. You can either hand-stitch it closed or use a dab of hot glue.
* **Attach the Stem:** If using needle and thread, carefully stitch the rolled fabric stem onto the top knot of your pumpkin. If using hot glue, apply a small amount of glue to the bottom of the fabric stem and press it firmly onto the twine knot at the top of the pumpkin.
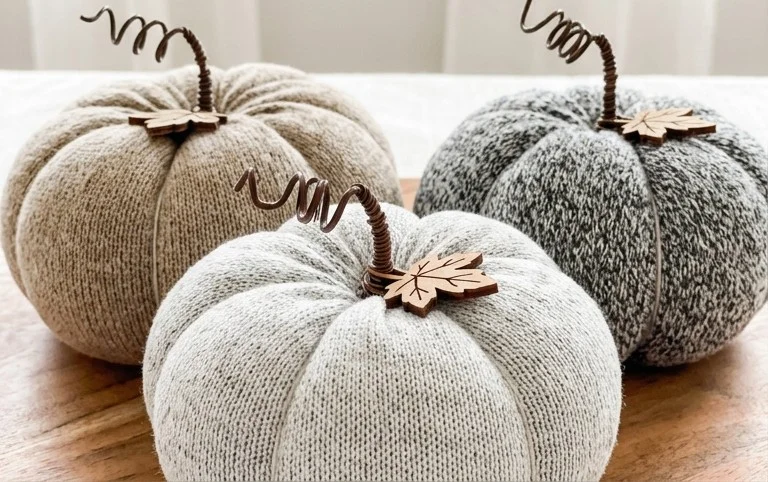
10. **Final Touches:** Fluff and shape your pumpkin to ensure it sits nicely. You can add a small leaf made from felt if you like, or a bit of curly wire for an extra decorative touch.
Styling Your Fabric Pumpkins: From Bare to Beautiful
Now that you’ve crafted your charming pumpkins, let’s talk about how to integrate them into your home decor.
* **Color Palette:** Think about your existing decor. For a classic fall look, warm tones like muted oranges, yellows, and creams are perfect. However, don’t shy away from more modern hues like dusty rose, sage green, or even a deep navy to complement your contemporary style. Using socks in varying shades of these colors will create a beautiful, curated look.
* **Texture Play:** Mix and match different sock textures! A ribbed sock will give your pumpkin a different feel than a smooth, plain one. Combine chunky knit socks with softer cotton ones for visual interest.
* **Placement is Key:**
* **Mantelpiece Magic:** Arrange a cluster of your fabric pumpkins on your mantelpiece. Mix in some faux greenery, pinecones, or battery-operated fairy lights for a festive glow.
* **Entryway Welcome:** Place a few larger pumpkins on your entryway table or on your porch steps (if they are covered and protected from the elements). Smaller ones can flank a welcome mat.
* **Shelf Styling:** Dot them around your bookshelves or display cabinets. They add a pop of seasonal color without overwhelming the space.
* **Coffee Table Centerpiece:** Create a simple arrangement on your coffee table with a few pumpkins, a decorative tray, and perhaps a small candle.
* **Rental-Friendly Vignettes:** In a rental, you can create beautiful displays on side tables, windowsills, or even piled in a decorative basket. They require no attachment and are easily removable.
* **Beyond the Pumpkins:** To make your pumpkin display truly shine, consider what you place around them. Natural elements like acorns, dried leaves, or small branches complement the rustic charm of fabric pumpkins. You can also mix them with other DIY decor items like fabric acorns or simple painted gourds.
Keeping Your Pumpkin Patch Tidy After Week One
The beauty of these fabric pumpkins is their low maintenance. After the initial week of admiration:
* **Dusting:** A gentle dusting with a soft cloth or a feather duster is usually all that’s needed.
* **Reshaping:** If your pumpkins get a bit squished from handling or being moved, simply give them a gentle squeeze and reshape them to their original form. The stuffing inside is forgiving.
* **Stain Removal:** For minor spills, dab gently with a damp cloth and mild soap, then allow to air dry completely. Avoid saturation.
* **Storage:** When the season is over, simply store them in a breathable bag or box in a cool, dry place. They don’t take up much space and will be ready to bring out next year.
Common Mistakes That Make This Project Fail
Even with a simple project, a few common pitfalls can prevent you from achieving the perfect pumpkin.
* **Understuffing:** This is probably the most common mistake. If you don’t stuff your pumpkin firmly enough, it will look saggy and won’t hold its shape well. You want it to be plump and proud!
* **Overstuffing (Too Early):** While you need to stuff firmly, don’t pack it so tightly in the initial stages that you can’t get the twine through easily to create the segments. Stuff gradually.
* **Loose Twine Knots:** If your twine knots aren’t secure, either at the base or the top, your pumpkin segments will loosen, and the pumpkin will lose its definition. Tie those knots TIGHTLY!
* **Uneven Segmenting:** Trying to force too many segments into a small pumpkin or not spacing them evenly can make the pumpkin look lopsided. Aim for a balanced distribution of your twine.
* **Ignoring Sock Quality:** Using socks with significant holes or very thin, worn-out material can lead to a less-than-ideal outcome. While minor flaws can be hidden, major ones will be visible. Choose your socks wisely!
* **Forgetting the Stem:** While not strictly a failure, a pumpkin without a stem can look a little unfinished. It’s a small detail that adds a lot of character.
Crafting these fabric pumpkins from old socks is a wonderfully satisfying project that brings a handmade touch of autumn charm into your home. They are inexpensive, eco-friendly, and endlessly customizable. So, rummage through your sock drawer, gather your supplies, and get ready to create a cozy display that you’ll adore all season long! Happy crafting!
Conclusion
Adding these charming fabric pumpkins to your home decor is a delightful way to inject a touch of seasonal warmth and personal style into your living space. You’ll find that these little touches make a surprising difference in your day-to-day enjoyment of your home, creating cozy nooks and inviting spaces. Why not start today? Gather a few old socks and some stuffing, and create your very own fabric pumpkin. For a different vibe, consider using burlap for a rustic feel in your kitchen, or small scraps of velvet for elegant accents in your bedroom. There are endless possibilities to personalize your home with handmade treasures. We hope this inspires you to explore more creative and budget-friendly decor ideas!