Easy Kitchen Paper Pile Organization Ideas
Organizing with style, especially when it comes to kitchen paper piles, doesn’t have to be a monumental task! Does your countertop often resemble a chaotic collection of flyers, mail, school notices, and takeout menus? I know mine used to! That’s why I’m so excited to share a super simple filing system that can transform your kitchen from cluttered to calm. Imagine clear counters, a sense of order, and knowing exactly where to find that important bill or recipe. This little project can cost you next to nothing, using supplies you might already have, and takes only about an hour to set up. You’ll learn how to create a visually appealing and functional system that makes managing those everyday paper messes a breeze, finally achieving that stylishly organized kitchen you’ve been dreaming of.
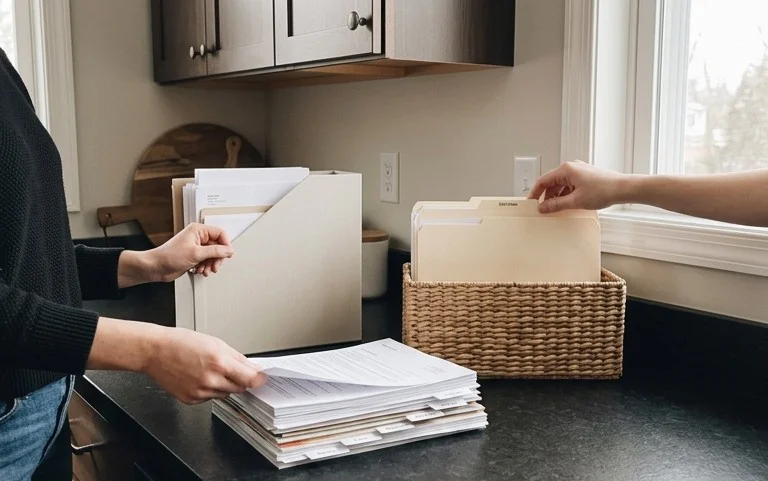
Tame the Countertop Chaos: Organizing Kitchen Paper Piles with Style
The kitchen. It’s the heart of the home, the place where culinary magic happens, and, for many of us, the ultimate dumping ground for paper. Bills, flyers, kids’ artwork, takeout menus, important notes – they all seem to find a way to accumulate on our countertops, creating a visual clutter that can feel overwhelming. I’ve been there, battling the ever-growing paper mountain myself. But I’ve discovered a simple, stylish filing system that has transformed my kitchen and, I’m confident, can do the same for yours. It’s not about elaborate, hidden solutions; it’s about creating an accessible, attractive system that integrates seamlessly into your kitchen’s workflow.
Why Paper Piles Are the Kitchen’s Arch Nemesis
Before we dive into solutions, let’s acknowledge why paper in the kitchen is such a persistent problem. It’s often the first place we drop things when we walk in, it’s where we might quickly jot down a recipe or a grocery list, and mail often lands here before being sorted. The sheer volume and variety of paper can make it feel impossible to manage. But with a little planning and a dash of style, we can conquer this.
What You’ll Need and Rough Costs
The beauty of this system lies in its simplicity and affordability. You don’t need a dedicated office supply store haul. Here’s what I recommend:
- Magazine Holders or Vertical File Sorters (2-3): These are your primary containers. Look for sturdy ones made of wood, acrylic, or thick cardstock. You can often find attractive options for $15-$30 each. For a set of three, budget around $45-$90.
- A Label Maker or Stylish Pens and Cardstock: A label maker ($30-$60) is a game-changer for clarity, but good quality cardstock ($5-$10 for a pack) and a nice pen ($5-$15) can achieve a similar, albeit more bespoke, look.
- Optional: Drawer Dividers or Small Trays: If you have a spare drawer, dividers ($10-$25) can house overflow or less frequently accessed paper items. Small decorative trays ($10-$20 each) can also corral smaller papers like coupons or receipts within a larger filing system.
- Optional: A Stylish Clipboard: For items you need immediate access to, like grocery lists or current recipes, a chic clipboard ($10-$25) can be a great addition.
Roughly, you’re looking at an initial investment of $50-$150 depending on your choices. This is a one-time cost for a system that will save you time and stress for years.
Measure Twice, Cut Once: Planning Your Paper Patrol
Before you rush out to buy anything, take a moment to assess your current paper situation and your kitchen space.
- Assess Your Paper Flow: How much paper do you typically accumulate in a week? What types of paper are the biggest culprits? Are they mostly bills, school papers, takeout menus, or something else? This will help you determine how many filing containers you need and what categories to create.
- Measure Your Space: Where do you envision this filing system living? Is it on a corner of your countertop, inside a cabinet, or perhaps on a shelf? Measure the available space precisely. For example, a typical countertop corner might offer a 12-inch by 18-inch footprint. Ensure your magazine holders or file sorters will fit comfortably without impeding workflow or making the space feel cramped. If you’re working with a smaller kitchen, consider the depth of the holders as much as the width.
- Consider Your Workflow: Think about how you interact with paper in your kitchen. Do you sort mail as soon as it comes in? Do you often need to reference recipes? Design your filing system to support your habits, not fight against them.
Taking these measurements and considering your habits will prevent you from buying containers that are too big or too small, or placing them in an inconvenient spot.
The Simple Filing System: A Step-by-Step Guide
Now for the fun part – implementing the system! It’s surprisingly straightforward.
- Declutter and Sort: This is the crucial first step. Pull out *all* the paper currently residing in your kitchen. Be ruthless. Recycle junk mail immediately. File away anything that belongs elsewhere. If you haven’t looked at it in six months and it’s not a critical document, consider letting it go. Create temporary piles for the categories you’ve identified (e.g., “Bills to Pay,” “To File,” “Recipes,” “Kids’ School,” “Reference”).
- Choose Your Containers: Based on your measurements and the volume of paper, select your magazine holders or vertical file sorters. Aim for a set that complements your kitchen’s aesthetic.
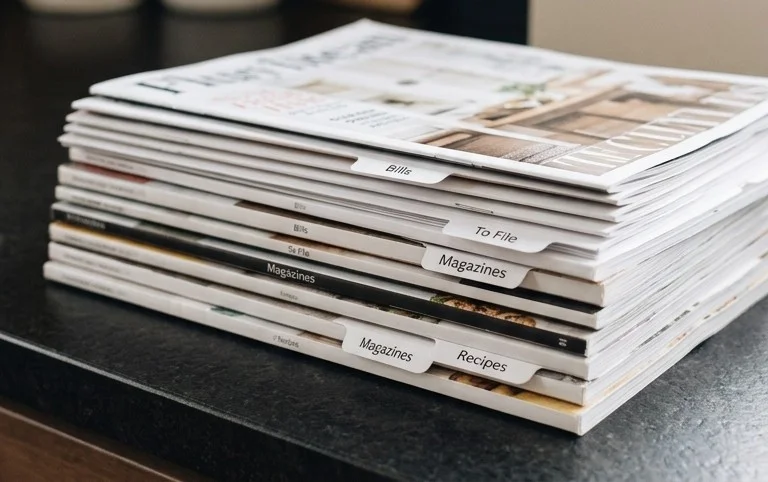
- Assign Categories: This is where your label maker or cardstock comes in. Assign a clear, concise category to each container. For example:
- Bills
- To Do/Action
- Recipes
- Kids’ School/Art
- Reference (e.g., takeout menus, coupons, important notes)
Keep the categories broad enough to avoid micro-managing, but specific enough to be useful.
- Label with Style: Affix your labels clearly to the front of each container. If using cardstock and a pen, consider punching a hole and tying it with a thin ribbon or using a stylish clip to attach it. The goal is for the labels to be legible and attractive.
- Place Your Containers: Position your labeled containers in your designated space. If they are on the countertop, place them in a way that’s easily accessible but doesn’t block essential workspace. If they are inside a cabinet, make sure they slide in and out smoothly.
- File the Paper: Now, go back to your sorted piles and place the corresponding papers into their designated containers. Start with the “To Do/Action” pile, then move on to others. This might take an hour or two initially, but it’s an investment in future sanity.
- Add Your Stylish Touches (Styling Notes): This is where we elevate the system from functional to fashionable.
- Color and Texture: Choose containers that either blend in with your kitchen’s existing color scheme or provide a subtle, stylish pop. Natural materials like wood or bamboo can add warmth, while sleek acrylic or metal can offer a modern feel.
- Placement for Workflow: Place the “Bills” or “To Do/Action” file in the most high-traffic area, easily visible. The “Recipes” file might live near your stove or prep area. “Kids’ School/Art” could be in a more central location for easy drop-off.
- Don’t Overstuff: Avoid cramming papers in. If a container is getting too full, it’s a sign you need to process that category more frequently or create a new one.
- Consider a “Catch-All” Tray: For truly immediate items (like a grocery list you’re writing *right now*), a small, attractive tray placed near your filing system can hold loose papers temporarily without creating clutter.
- The Clipboard Option: If you have a menu you’re constantly referencing or a school notice that needs to be seen, clip it to a stylish clipboard and place it alongside your filing system. This adds a visual anchor and keeps important items front and center.
The key is that the system looks intentional and visually appealing, not like an afterthought.
Adapting for Small Spaces and Rentals
Worried about space or unable to drill holes? No problem!
- Vertical is Your Friend: In small kitchens, think vertically. Use taller, narrower magazine holders that don’t take up much counter depth. You can even stack some types of holders if they are designed for it.
- Cabinet Power: If countertop space is at a premium, utilize cabinet interiors. Measure the inside of your cabinets carefully and choose file sorters that fit. You can often slide these in and out easily.
- No-Drill Solutions: For rentals where drilling is forbidden, focus on freestanding solutions. Magazine holders are perfect. Command strips can be used to attach lightweight labels or small organizers to cabinet doors or walls if allowed by your landlord, but always check the terms.
- Slimline Storage: Look for slimline magazine holders that have a smaller footprint. Some are designed to hold a surprisingly large amount of paper without looking bulky.
Keeping the Momentum: Tidy After Week One
The real test of any organization system is its longevity. Here’s how to keep your kitchen paper piles at bay after the initial setup:
- The Daily Scan: Take 2-3 minutes each day to scan your mail and any new papers. Immediately recycle junk mail, file what belongs, and place actionable items in the “To Do/Action” or “Bills” folder.
- The Weekly Sort: Dedicate 15-20 minutes each weekend to process the contents of your filing system. Go through the “Bills” folder and pay them. Review the “To Do/Action” folder and tackle those tasks. File away recipes you’ve used. Clear out your “Kids’ School/Art” folder, keeping only what you truly want to preserve. This prevents any one category from becoming overwhelming.
- “One In, One Out” for Recipes: When you add a new recipe to your file, consider if there’s an old one you no longer need. This keeps your recipe collection curated.
- Be Realistic: Life happens, and sometimes a few extra papers might creep onto the counter. Don’t beat yourself up. Just address them during your next daily or weekly sort. The goal is management, not absolute perfection.
The Pitfalls: Mistakes That Make This System Fail
Even the simplest systems can falter if we’re not mindful. Here are common mistakes that can derail your paper-organizing efforts:
- Too Many Categories: Trying to create a separate file for every single type of paper is overwhelming and unsustainable. Stick to broad, manageable categories.
- Ignoring “To Do/Action”: This is the most critical folder. If it becomes a black hole of undone tasks, the entire system will feel like a failure. Prioritize processing this folder.
- Not Processing Regularly: The biggest sin is letting the files become overflowing dumps. Regular sorting prevents this.
- Using Ugly Containers: If the containers are unattractive, you’ll be less inclined to use them or keep them visible. Invest in something that pleases your eye.
- Placing It Inconveniently: If the filing system is in an awkward spot that requires extra effort to access, you won’t use it. Ensure it’s integrated into your kitchen’s natural flow.
- Believing It’s a One-Time Fix: Organization is an ongoing process, not a destination. This system requires a few minutes of your time each day or week to maintain.
By implementing this simple, stylish filing system and being mindful of these potential pitfalls, you can finally bring order to your kitchen’s paper piles and enjoy a more peaceful, organized space. It’s a small change that can have a significant impact on your daily life.
Conclusion
Transforming your kitchen paper piles into an organized, stylish system can truly make a difference in your day-to-day life. No more frantic searching for that bill or recipe! The feeling of calm and control is invaluable. Ready to start organizing with style? Your smallest first step today could be as simple as designating one small basket for incoming mail.
Variations to Inspire:
For your entryway, try a chic wall-mounted organizer with compartments for keys and outgoing mail. On a tighter budget, a set of attractive magazine holders can corral important documents in any room.
We hope these ideas inspire you to create a more streamlined and beautiful home. Explore our site for even more organizing with style solutions!