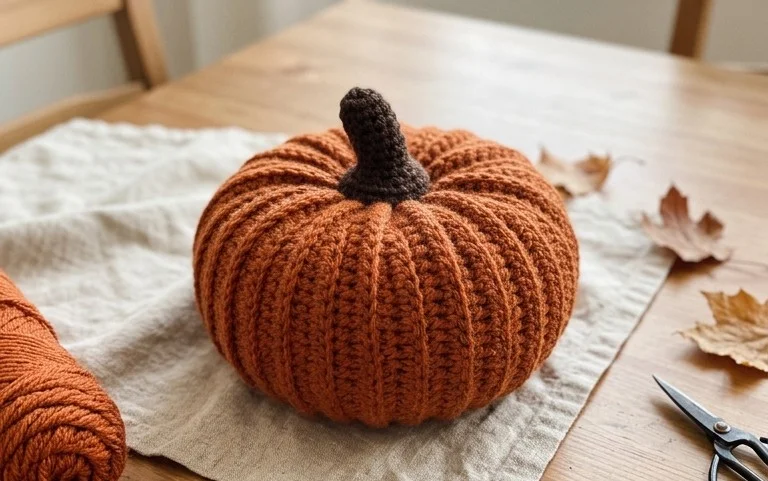
A plump crochet pumpkin, resting on a side table, brings an instant touch of autumn warmth. These aren’t the fiddly, tiny pumpkins; these are the substantial, satisfying ones that look wonderful piled in a basket or displayed on a mantle. This pattern is designed to be straightforward, making it perfect even if you’re just getting the hang of crochet. We’ll walk through yarn choices, essential stitches, how to make them your own, and keeping them looking their best.
Choosing Your Yarn and Hook For these chunky pumpkins, you want a yarn that has some body and a bit of texture. Worsted weight acrylic yarn is a fantastic choice. It’s readily available, comes in a huge range of colors, and is easy to care for. Brands like Red Heart Super Saver, Caron One Pound, or Lion Brand Vanna’s Choice are excellent and budget-friendly. If you prefer a more natural feel, a wool or wool blend in a similar weight would also work beautifully, though they might require a bit more care. The hook size will depend on the yarn you select and the fabric you want. For most worsted weight yarns, a US size H/8 (5.0 mm) or I/9 (5.5 mm) hook is a good starting point. You want a fabric that’s firm enough to hold its shape without large gaps, but not so tight that it’s difficult to work with. If your stitches are looking loose and floppy, try going down a hook size. If your hands are cramping and you can barely get the hook through, go up a hook size. A US Size J/10 (6.0 mm) hook can also work for a looser drape, but for these larger pumpkins, firm is usually better. When you’re just starting out, a sturdy acrylic yarn in a classic pumpkin shade like orange, beige, or deep red is wonderful. You might even consider a variegated yarn for a unique look without changing colors mid-project.
Crafting Cozy Crochet Pumpkins: Your Easy Pattern Guide
A plump crochet pumpkin, resting on a side table, brings an instant touch of autumn warmth. These aren’t the fiddly, tiny pumpkins; these are the substantial, satisfying ones that look wonderful piled in a basket or displayed on a mantle. This pattern is designed to be straightforward, making it perfect even if you’re just getting the hang of crochet. We’ll walk through yarn choices, essential stitches, how to make them your own, and keeping them looking their best.
Choosing Your Yarn and Hook
For these chunky pumpkins, you want a yarn that has some body and a bit of texture. Worsted weight acrylic yarn is a fantastic choice. It’s readily available, comes in a huge range of colors, and is easy to care for. Brands like Red Heart Super Saver, Caron One Pound, or Lion Brand Vanna’s Choice are excellent and budget-friendly. If you prefer a more natural feel, a wool or wool blend in a similar weight would also work beautifully, though they might require a bit more care.
The hook size will depend on the yarn you select and the fabric you want. For most worsted weight yarns, a US size H/8 (5.0 mm) or I/9 (5.5 mm) hook is a good starting point. You want a fabric that’s firm enough to hold its shape without large gaps, but not so tight that it’s difficult to work with. If your stitches are looking loose and floppy, try going down a hook size. If your hands are cramping and you can barely get the hook through, go up a hook size. Always check the yarn label for its recommended hook size and use that as a guide, but don’t be afraid to adjust.
Essential Crochet Stitches
This pattern primarily uses a few fundamental crochet stitches. Mastering these will open up so many possibilities in your crochet journey.
- Chain (ch): This is the foundation of most crochet projects. It’s simply a series of interlocking loops.
- Single Crochet (sc): This is a basic, dense stitch that creates a firm fabric. It’s worked by inserting your hook into a stitch, yarning over, pulling up a loop, yarning over again, and pulling through both loops on your hook.
- Slip Stitch (sl st): Used for joining rounds or moving across stitches without adding height.
- Magic Ring (or adjustable ring): This creates a perfectly closed center for your piece, avoiding that small hole you often get when starting with a chain. It involves creating a loop with your yarn and working your first stitches into that loop.
Don’t worry if these sound a little daunting. Each round typically builds on the last, and the pattern will guide you step-by-step. Many online videos can show you exactly how to do each of these stitches if you’re a visual learner.
Tips for Beginners
If you’re new to crochet, don’t be discouraged! These pumpkins are a great way to build confidence.
- Start with a lighter color: It’s easier to see your stitches when they’re not dark yarn.
- Use a stitch marker: These little plastic rings are invaluable for marking the beginning of your rounds. It’s easy to lose count or miss where a round starts and ends, especially when working in a spiral.
- Consistent tension is key: Try to hold your yarn and hook in the same way for every stitch. This will give you a more even fabric. If your tension is all over the place, take a break and come back to it.
- Don’t be afraid to frog it: “Frogging” is crochet slang for pulling out your stitches to start again. It’s much better to undo a few rows if something looks wrong than to keep going and have a wonky finished piece.
- Read ahead: Before you start a round, read the entire instruction for that round so you know what’s coming.
Customizing Your Pumpkins
One of the best things about crochet is how easily you can personalize your creations.
- Colors: This pattern is designed for classic orange, but don’t stop there! Try deep reds, muted yellows, creamy whites, or even sophisticated grays and blues for a more modern look. For a festive touch, you could even make striped pumpkins.
- Sizes: The pattern is written for a specific size, but you can easily adjust it. To make a larger pumpkin, simply add more rounds of the “increase” section and then more rounds of the “straight” section before starting the decrease. To make a smaller pumpkin, do fewer increase rounds and fewer straight rounds. Remember that changing the size will also affect how much stuffing you need.
- Stems: The stem is often crocheted separately and then attached. You can make it longer, shorter, thicker, or thinner by adjusting the number of stitches or rows in the stem section. Some people like to add a little crochet leaf or vine to the stem for extra detail.
Caring for Your Finished Pumpkin
Your crochet pumpkins are quite durable, but a little care will keep them looking great for years.
- Cleaning: For minor dust or dirt, a gentle brush with a soft-bristled brush or a lint roller usually does the trick. If it needs a more thorough cleaning, hand wash it in cool water with a mild detergent. Avoid wringing or twisting, which can distort the shape. Gently squeeze out excess water and lay it flat on a clean towel to dry, reshaping it as needed.
- Storage: When the season is over, store your pumpkins in a breathable bag (like a cotton tote) in a cool, dry place. Avoid plastic bags, which can trap moisture and lead to mildew.
Project Ideas for Your Crocheted Pumpkins
These pumpkins are incredibly versatile and can be used in so many ways to bring a handmade touch to your home decor.
- Mantle Display: Pile a few in varying sizes and colors on your fireplace mantle.
- Table Centerpiece: Arrange a collection on a wooden board or in a decorative bowl for a charming table setting.
- Seasonal Wreath: Attach smaller pumpkins to a grapevine wreath form for an autumnal welcome.
- Doorstep Decor: Group a few on your porch steps.
- Gift Giving: They make thoughtful, handmade gifts for friends and family who appreciate handmade items.
- Photo Props: Their cheerful appearance makes them perfect props for fall-themed photoshoots.
- Kids’ Play: Larger, softer pumpkins can be fun for little ones to play with.
Creating these easy crochet pumpkins is a rewarding project that adds instant seasonal charm to your home. With a few basic stitches and some fun yarn choices, you can have a whole patch of them ready to decorate.
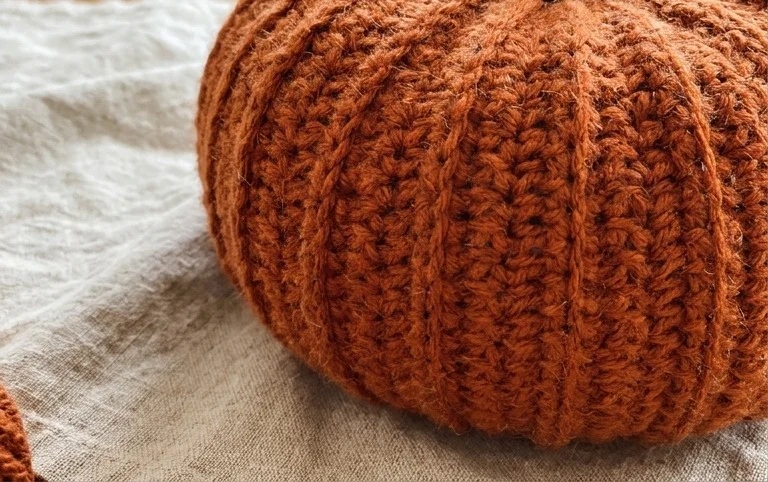
You’ve now got the guidance to create your own charmingly large crochet pumpkins. They make fantastic handmade decorations for your home, adding a cozy, autumnal feel that lasts for months. Think about making a set in different sizes and colors for a real statement piece on your coffee table or bookshelf. Don’t forget to share photos of your finished pumpkins on social media – makers love to see what others create! Tagging the pattern makes it easy for others to find this fun project too.
If you enjoyed this pattern, be sure to check out more crochet projects right here. Experiment with different stitch patterns for future pumpkins, or try adding some simple embroidery for extra detail. Happy crocheting!